


Solar lights are a fantastic way to illuminate your outdoor spaces while embracing eco-friendly lighting. However, over time, components like solar light batteries, solar panels, or LED bulbs may wear out, dimming your lights or stopping them altogether. Replacing these parts is a cost-effective way to restore solar light performance without buying new fixtures. This beginner-friendly DIY solar light repair guide walks you through the process of replacing common solar light parts, including a list of tools, step-by-step instructions, and troubleshooting tips to ensure success. Whether you’re fixing solar garden lights or solar pathway lights, this guide will empower you to tackle repairs with confidence.

Why Replace Solar Light Parts?
Maintaining solar outdoor lights by replacing worn components extends their lifespan and keeps your yard brightly lit. Common issues like dimming, short runtime, or complete failure often stem from degraded rechargeable batteries, faulty solar panels, or burned-out LED bulbs. By learning to replace these solar light components, you save money and reduce waste, aligning with the sustainable ethos of solar-powered lighting. This guide is designed for beginners, requiring no prior technical experience, just a willingness to dive into a simple DIY project.
Tools and Materials Needed
Before starting your solar light repair, gather these tools and materials to make the process smooth and efficient:
- Screwdriver set (Phillips and flathead): For opening battery compartments or light casings.
- Replacement batteries: Typically NiMH or Li-ion, matching your light’s specifications (e.g., AA 600 mAh).
- Replacement solar panel: Ensure compatibility with your light’s voltage and size.
- Replacement LED bulb: Match the wattage and socket type of your original bulb.
- Soft cloth and mild detergent: For cleaning components during the process.
- Multimeter (optional): To test battery charge or electrical connections.
- Gloves: To protect your hands and prevent oil transfer to components.
- Replacement stakes or mounts (if needed): For securing solar pathway lights.
- Recycling bag: For responsibly disposing of old batteries.
Check your light’s manual or product label for specific part requirements, such as battery type or solar panel size, to ensure compatibility.
Step-by-Step Guide to Replacing Solar Light Parts
Follow these detailed steps to replace the most common solar light components. Each process is broken down to be beginner-friendly, with tips to avoid common pitfalls.
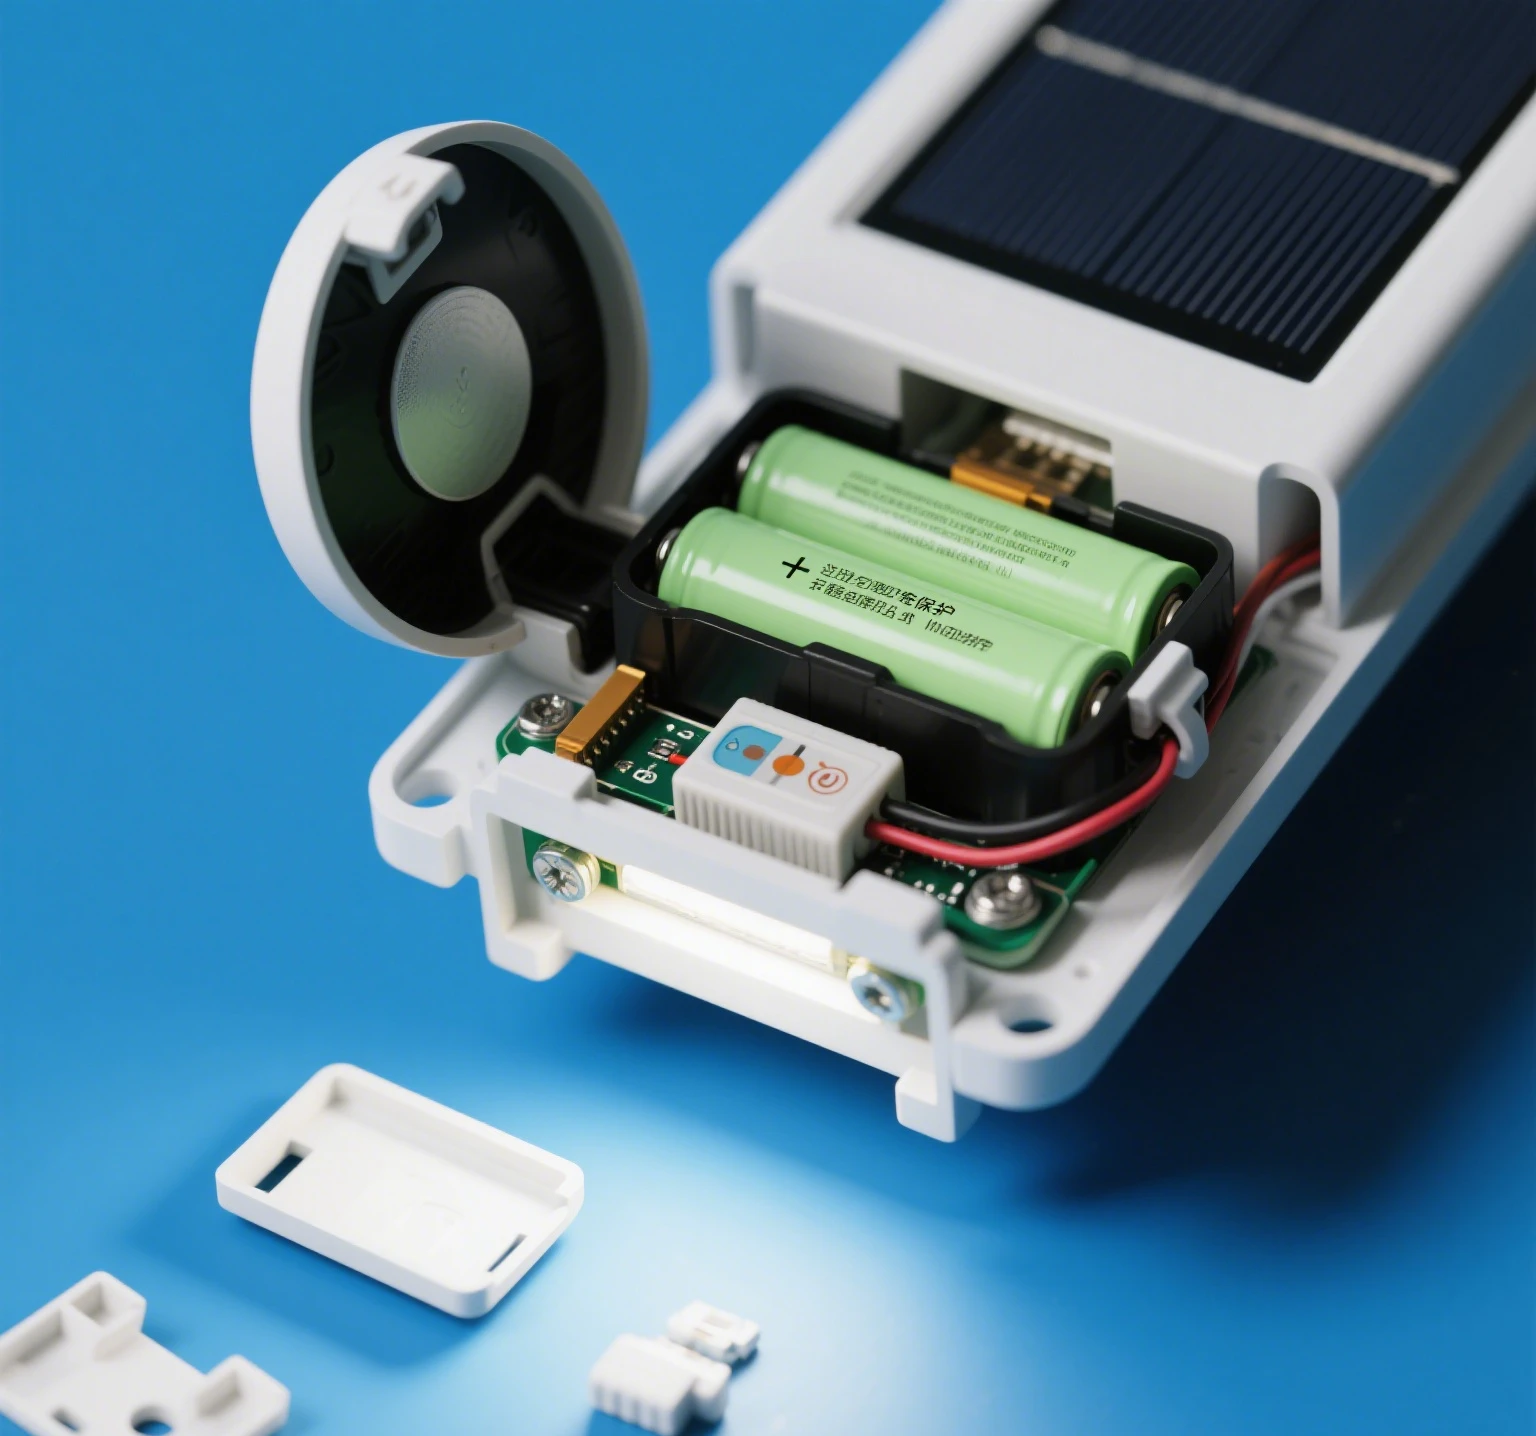
Step 1: Replacing the Solar Light Battery
The solar light battery is often the first component to fail, typically lasting 1–3 years. A failing battery may cause dim lights or short runtimes.
- Turn off the light: If your solar light has an on/off switch, turn it off to prevent electrical issues.
- Locate the battery compartment: This is usually near the solar panel or inside the light fixture. Use a screwdriver to open the compartment, noting any clips or screws.
- Remove the old battery: Gently pull out the battery, checking for corrosion. If corrosion is present, clean the contacts with a cloth and vinegar.
- Insert the new battery: Match the polarity (+ and -) of the rechargeable battery to the compartment markings. Common types include AA or AAA NiMH batteries (e.g., 1.2V 600 mAh).
- Secure the compartment: Close the compartment tightly to prevent water ingress, which can damage solar light electronics.
- Test the light: Place the light in sunlight to charge for 6–8 hours, then check if it turns on at dusk.
Tip: Recycle old batteries at a local recycling center to support sustainable lighting practices.
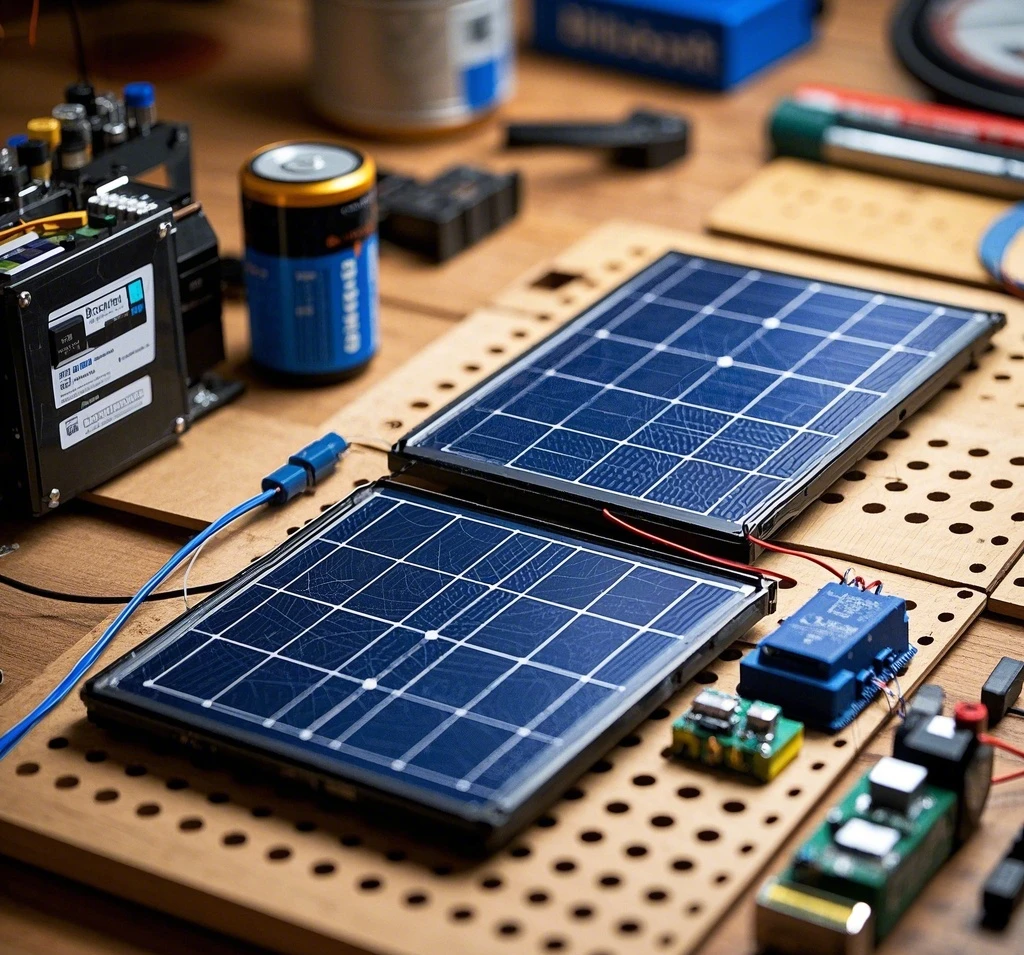
Step 2: Replacing the Solar Panel
A cracked or cloudy solar panel can reduce charging efficiency, leading to poor solar light performance. Replacing it is straightforward with the right part.
- Identify the panel type: Check your light’s manual or label for the panel’s voltage (e.g., 2V or 3.2V) and size. Purchase a compatible solar panel replacement.
- Access the panel: Unscrew or unclip the panel from the light fixture. Note any wiring connections, taking a photo for reference if needed.
- Disconnect the old panel: Carefully detach the wires, which may be soldered or connected via clips. If soldered, you may need a soldering iron or professional help.
- Install the new panel: Connect the new solar panel to the wiring, ensuring secure connections. Use waterproof sealant if the panel is exposed to rain.
- Reassemble and test: Secure the panel in place, charge it in direct sunlight, and verify that the light functions properly.
Tip: Clean the new solar panel with a soft cloth to remove dust or fingerprints, ensuring optimal solar energy capture.
Step 3: Replacing the LED Bulb
If your solar light is dim or flickering, the LED bulb may need replacement, though LEDs typically last up to 50,000 hours.
- Confirm the bulb type: Check the manual or original bulb for specifications (e.g., 0.5W warm white LED). Purchase a matching solar LED bulb.
- Access the bulb: Open the light fixture, usually by unscrewing the lens or cover. Be gentle to avoid damaging the casing.
- Remove the old bulb: Twist or pull the bulb out, depending on the socket type. If it’s soldered, consult a professional unless you’re experienced with soldering.
- Install the new bulb: Insert the new LED bulb, ensuring a firm connection. Avoid touching the bulb directly to prevent oil residue.
- Test the light: Reassemble the fixture, charge the light in sunlight, and check the brightness at night.
Tip: If the light still doesn’t work after replacing the bulb, test the battery or solar panel for issues.
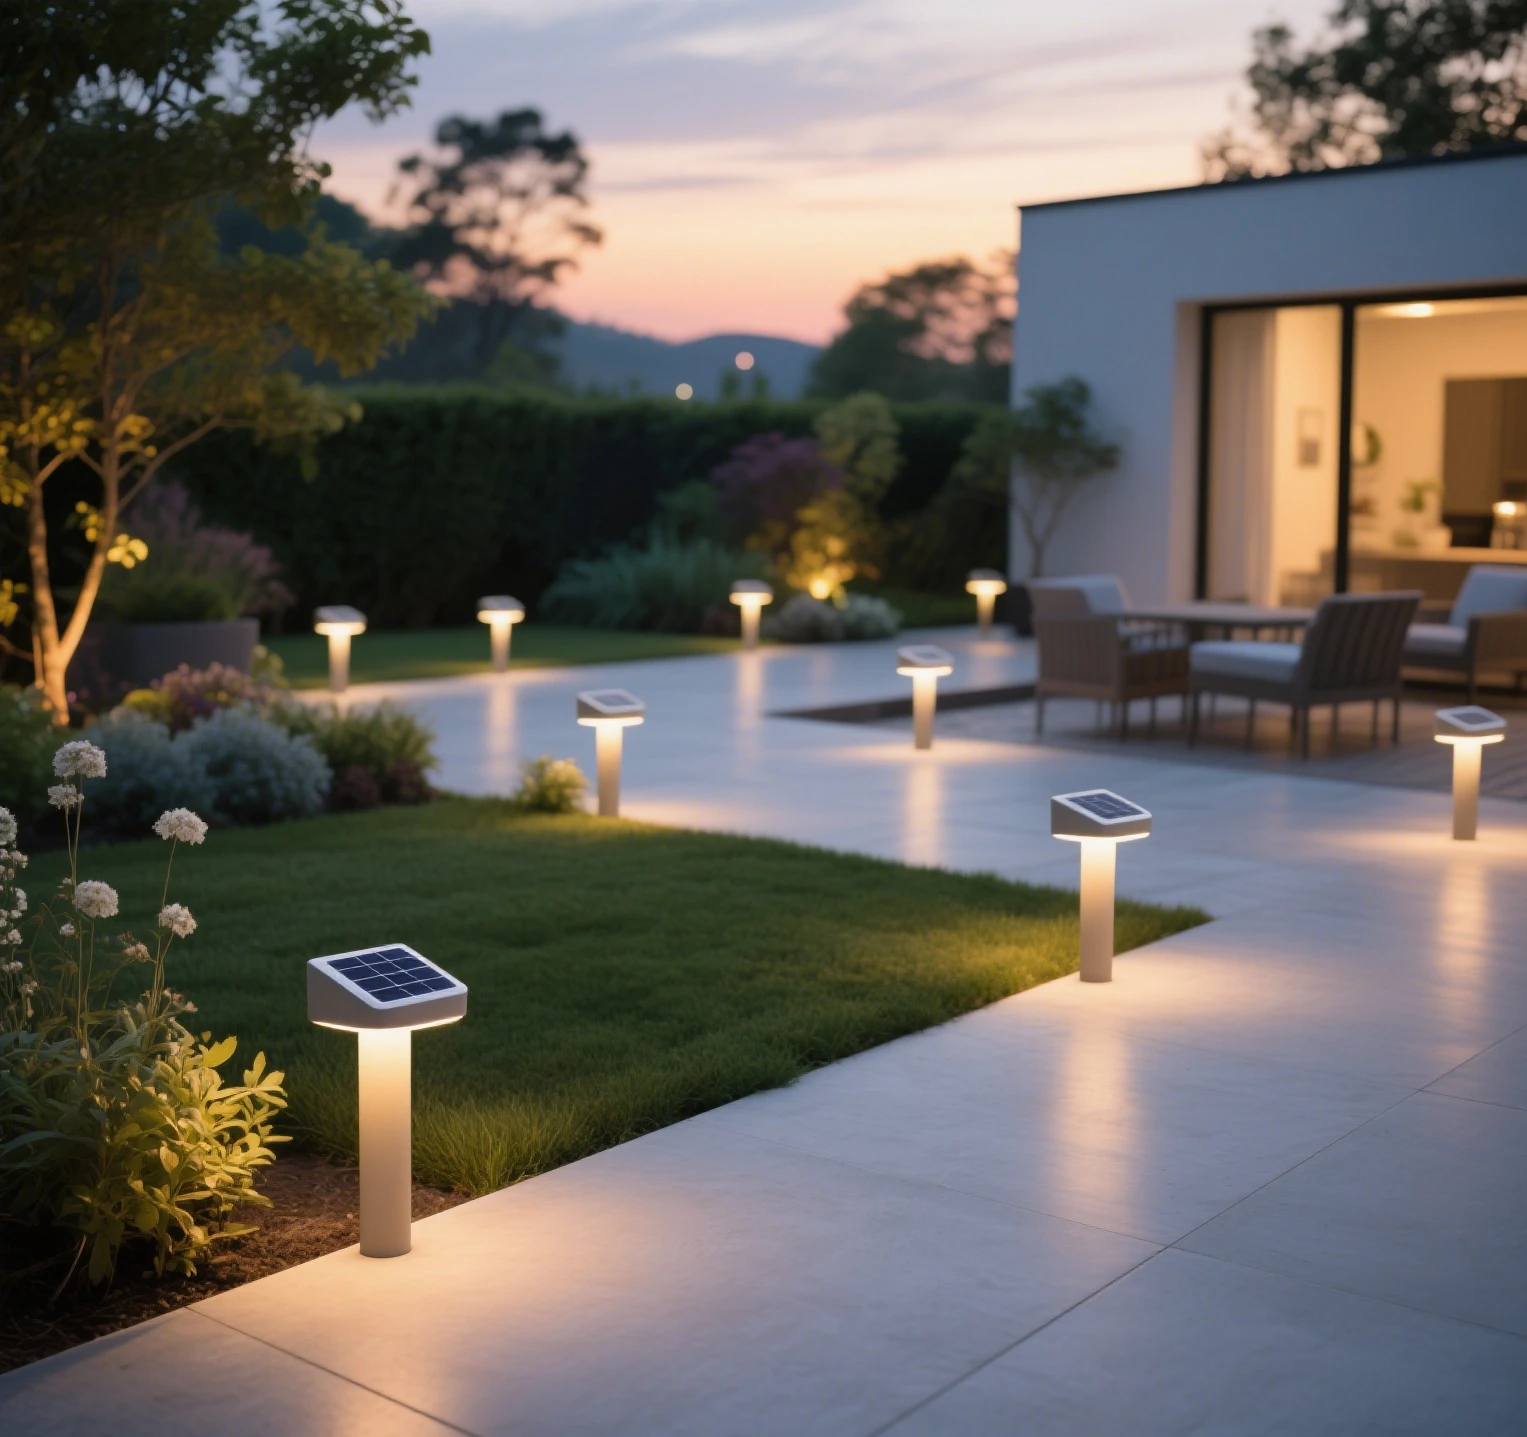
Step 4: Securing or Replacing Mounting Stakes
For solar pathway lights, broken mounting stakes can cause instability. Replacing them ensures your lights stay upright.
- Remove the old stake: Pull the light from the ground and detach the broken stake, usually connected by a clip or screw.
- Attach the new stake: Purchase a compatible replacement stake and secure it to the light base. Ensure it’s sturdy enough for your soil type.
- Reinstall the light: Push the new stake into the ground, ensuring the solar panel faces direct sunlight.
Tip: Use a rubber mallet to gently tap the stake into hard soil, avoiding damage to the solar light.
Troubleshooting Common Issues
Even with careful repairs, issues may arise. Here are solutions to common problems encountered during DIY solar light repair:
- Light doesn’t turn on: Verify the solar light battery is correctly installed and charged. Clean the solar panel to ensure it’s receiving sunlight. If using a multimeter, check the battery voltage (e.g., 1.2V for NiMH).
- Dim or flickering light: This often indicates a low battery charge or dirty solar panel. Clean the panel and charge for a full day. If the issue persists, replace the LED bulb or battery.
- Short runtime: Insufficient sunlight or a degraded battery may be the cause. Relocate the light to a sunnier spot or replace the rechargeable battery.
- Water damage: If water enters the battery compartment, dry it thoroughly and apply waterproof sealant to prevent future issues.
If problems persist, consult the manufacturer’s support or online forums for model-specific advice on solar light maintenance.
Tips for Success
To make your DIY solar light repair a success, keep these tips in mind:
- Work in a clean space: Lay out a towel to organize small parts and prevent loss.
- Check compatibility: Ensure solar light parts match your light’s specifications to avoid malfunctions.
- Clean components: Wipe the solar panel and light fixture during repairs to boost solar light efficiency.
- Test after each step: Charge and test the light after replacing each part to pinpoint issues early.
- Source quality parts: Purchase solar light components from reputable retailers like Amazon, Home Depot, or Gama Sonic for durability.
Where to Buy Replacement Parts
Finding reliable solar light replacement parts is key. Online retailers like Amazon offer solar light batteries (starting at $8.99 for a 4-pack) and solar panel replacements ($11–$20). Home Depot and Lowe’s carry LED bulbs and mounting stakes ($5–$15) in-store. For brand-specific parts, check manufacturers like Gama Sonic or MAXSA Innovations, which provide solar light accessories designed for their models. Always read reviews to ensure quality and compatibility.
Benefits of DIY Repairs
Repairing solar outdoor lights yourself is rewarding and sustainable. It saves money compared to replacing entire fixtures, often costing less than $20 for parts versus $50+ for new lights. It also reduces waste, supporting eco-friendly lighting practices. Plus, mastering DIY solar light repair builds confidence for future home projects, as shared by many DIY enthusiasts on platforms like Reddit.
Conclusion
Replacing solar light parts is a beginner-friendly DIY project that breathes new life into your solar garden lights and solar pathway lights. With the right tools, a clear step-by-step approach, and troubleshooting know-how, you can restore your solar lights to full brightness. By maintaining your solar-powered lighting, you not only save money but also contribute to a greener planet. Grab your screwdriver, start your solar light repair, and enjoy the glow of your revitalized solar outdoor lights!

Leave a Reply